Workbench manual · Chapter 2 of 7
Choose size, fabric and colors
Tune the chart draft in Setup, check the physical dimensions, and apply conversion choices only when the preview is ready.
In this manual
Before you begin
- Open an applied photo chart or a blank chart in the Workbench.
- Know whether you want to work in stitches, centimeters or inches.
- Have the fabric count and border you intend to use if physical sizing matters.
What you will have
The chart has an intentional size, fabric setup and thread scope, with the applied result updated only after you confirm it.
Steps
Set the chart dimensions
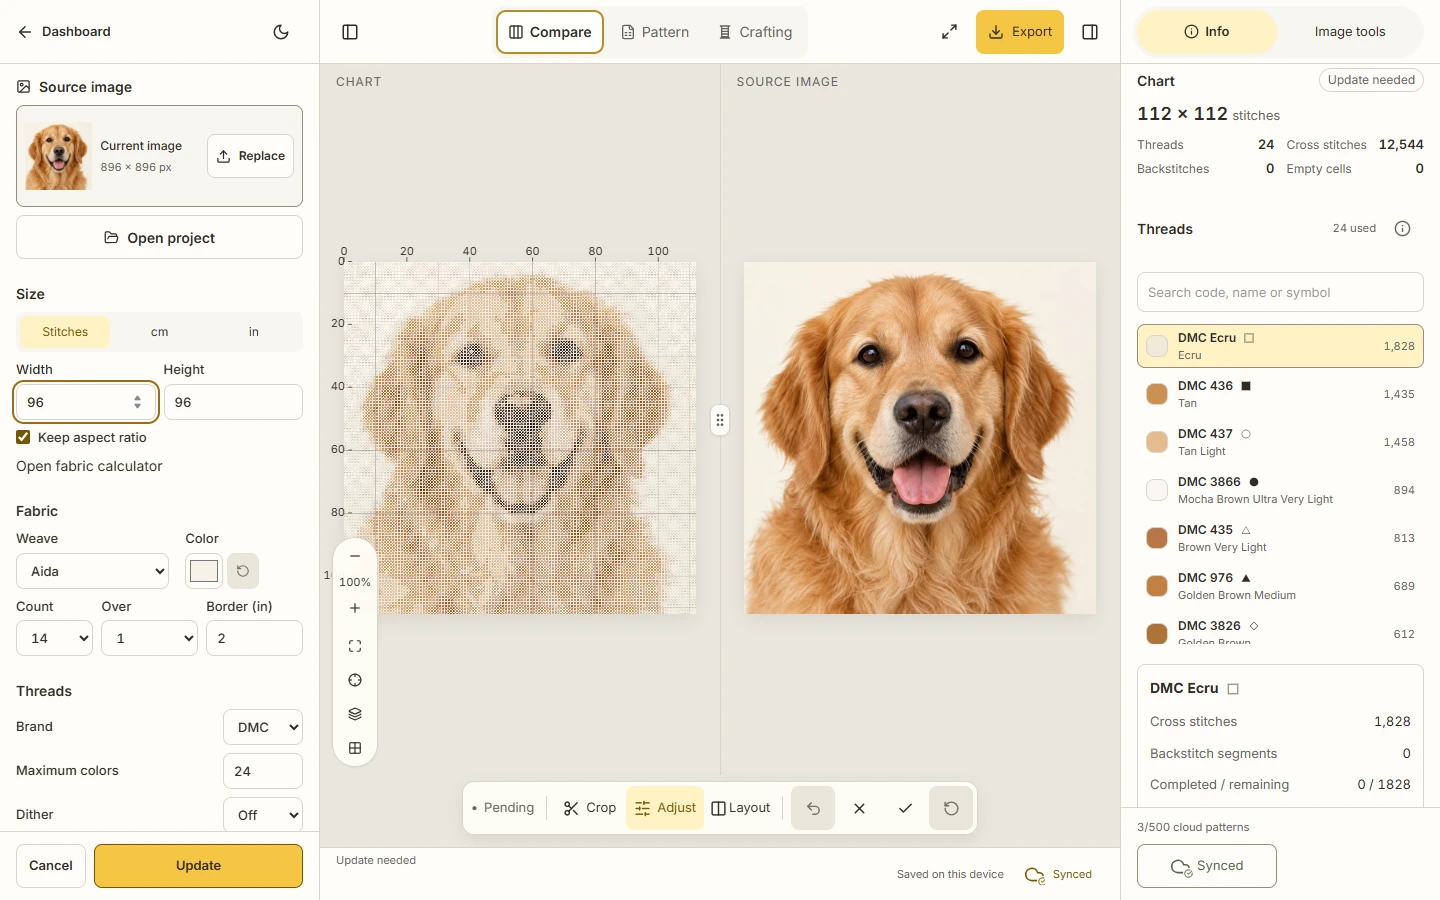
In Setup, open Size and choose Stitches, cm, or in. Enter Width and Height, then use Keep aspect ratio when the source proportions should stay linked.
Expected result. The displayed dimensions change in the selected unit while the current chart remains unchanged until Update.
Set fabric facts
Use the Fabric controls for weave, color, count, Over and border. If you need to compare physical measurements, open the fabric calculator with the current values.
Expected result. The draft shows the fabric assumptions that the next chart update will use, and the calculator opens without mutating the project.
Limit the conversion palette
In the color scope, choose Maximum colors and inspect the Available, Excluded and Used thread groups. Exclude only verified DMC threads you do not want considered.
Expected result. The draft palette scope is visible and the Used count describes the current chart rather than silently changing it.
Decide whether to dither
Leave Dither Off for a cleaner baseline, or turn it On when nearby thread colors should soften a gradient. Read the hint first because dithering may add scattered stitches.
Expected result. The setting is marked as a pending conversion choice; the original image remains unchanged.
Apply the draft deliberately
Review the source, size and color draft in Compare, then choose Update. If the draft is not right, choose Cancel or Restore source before applying it.
Expected result. The new chart reflects the selected settings, while the original saved project remains available as the separate previous version when a photo replacement was used.
See the task
If something does not look right
- Use Cancel when you want to discard pending size, fabric, image or color changes. It does not undo already applied stitch edits.
- Use Restore source in Compare to return crop and neutral image adjustments to the applied source before Update.
- If a setting makes the result harder to read, return to the previous applied project or use pattern history instead of assuming a lower color count is better.
Limits to keep in mind
- Fabric count and Over describe physical sizing inputs; they do not measure actual thread quantities or stitching time.
- Dithering is a conversion choice and can add dispersed stitches. It is separate from the Clean diagnostics.
- Only the registered DMC catalog is supported for these controls. A symbol is a chart mark whose thread identity comes from the key.