Workbench manual · Chapter 1 of 7
Create or open a pattern
Start with a photo, a blank chart, or a complete project file while keeping the applied chart and any earlier project safe.
In this manual
Before you begin
- To start from a photo, have a PNG, JPEG or WebP image no larger than 12 MiB and no more than 40 million pixels.
- To reopen work, have a complete .crosy, .json or .fcjson project file.
- For a blank chart, decide the chart name, width, height and fabric count before creating it.
What you will have
An editable chart opens in the Workbench with a clear applied source or an empty board ready for drawing.
Steps
Open the Workbench
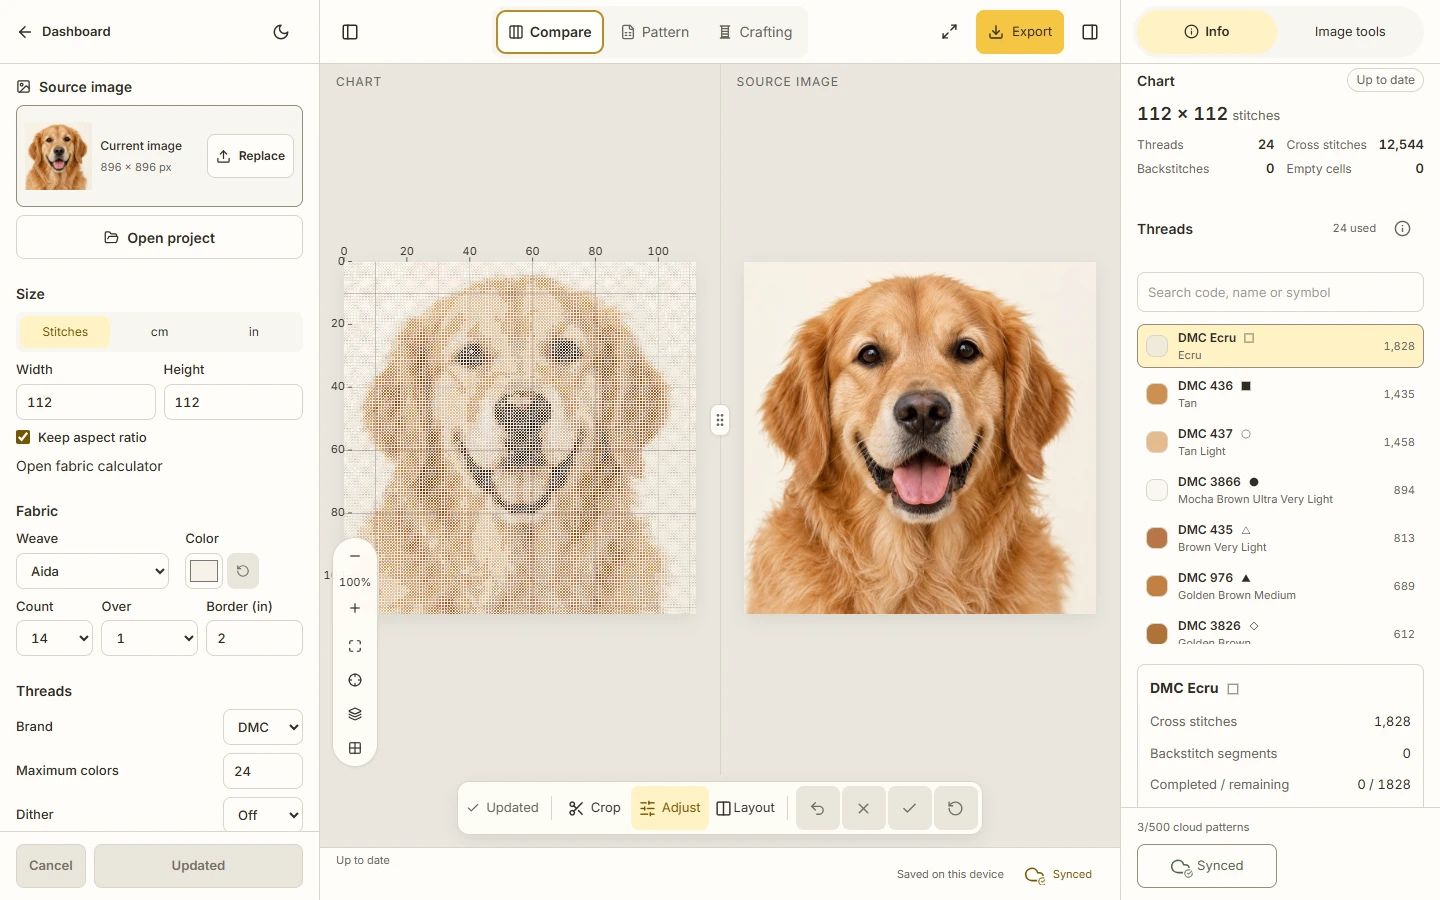
Open the editor from Home, Studio, or the direct editor link. The Workbench starts in Compare when a photo is available and keeps Setup on the left and Tools on the right.
Expected result. You can see the Workbench mode tabs and the Source image or Project section without changing a saved chart.
Create from a photo
In Source image, choose Upload and select one PNG, JPEG or WebP file within the 12 MiB and 40 million-pixel limits. The first photo is converted and saved automatically; there is no second Generate button for this first handoff.
Expected result. Compare opens with the chart and source visible together, and the chart can be inspected before you make further changes.
Open a complete project
Choose Open project in the Source or Project section and select a complete Crosy, JSON, or FlossCross project. Wait for validation before editing it.
Expected result. The imported chart, thread key, layers and available progress are loaded as one project. A parameter-only file is rejected without replacing the current work.
Start a blank chart when you need an empty board
From Studio choose Blank chart, then enter a name, width, height and fabric count. Keep the dimensions between 8 and 200 stitches per side.
Expected result. A saved blank chart opens with an empty board ready for drawing and no photo conversion controls pretending that a photo exists.
Inspect before replacing anything
For an existing chart, use Replace only when you want a new photo version. Review the pending Compare result, then choose Update to apply it; choose Cancel to restore the current photo and settings.
Expected result. The previous project remains separate until Update succeeds, and the replacement starts without the previous chart progress or cloud copy.
See the task
If something does not look right
- If conversion or saving fails, keep the photo handoff available and retry from the same editor entry instead of selecting a second file immediately.
- If a project file is rejected, verify that it is a complete .crosy, .json or .fcjson document, then reopen the last known-good backup.
- If you leave while Setup or Image changes are still pending, the Workbench asks whether to continue. Update first when those changes matter; pending drafts do not follow navigation.
Limits to keep in mind
- The first photo import generates directly. Later source, size, fabric and conversion edits stay pending until Update.
- Device saving is available without an account. Dashboard and cloud membership require a signed-in account.
- A blank chart is an editing surface; it does not create a photo source or promise a conversion result.