Design a cross stitch pattern from scratch
Draw a tiny tulip on a blank 24-by-24 chart. Follow the counted steps, check four thread colors, and download the finished pattern and editable project.
By Crosy Editorial Team · Last updated: 2026-10-15
Make one complete pattern, without a photo
This lesson starts with empty squares and ends with Tiny tulip: an original 24 × 24 chart containing 98 full Crosses in four colors. You will choose the board size, draw a small motif, check its thread key, and reopen the finished project. There are no Backstitch lines or fractional stitches in this example.
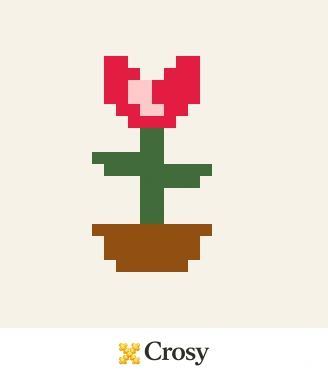
The completed counted design. This is a chart preview, not a photograph of stitched fabric.
Download the lesson files
- Printable three-page PDF with overview, chart and complete thread key.
- Scalable SVG chart and key.
- Finished editable Crosy project.
- Empty 24 × 24 Crosy project.
- Complete row-by-row CSV and file notes.
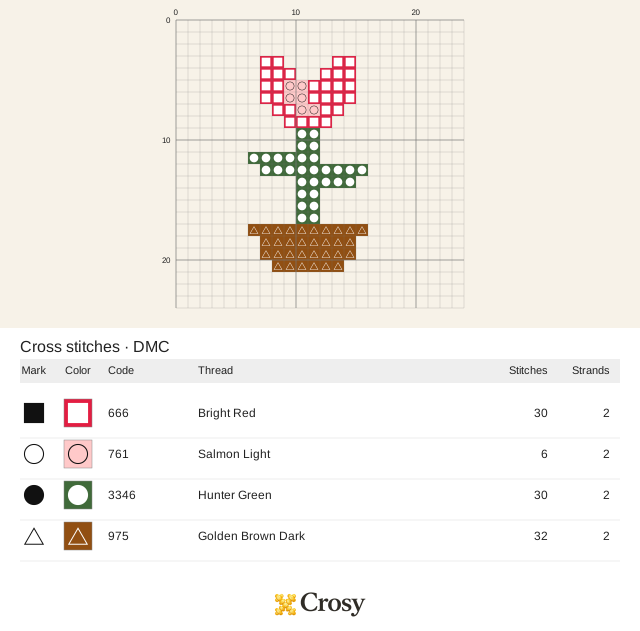
The supplied files let you inspect and follow this particular lesson. Downloads for your own patterns follow the current account and export options. The editable project is a backup; the PDF and SVG are reading files, not a replacement for the project's editable state.
1. Choose a small board and a clear shape
Start with one recognizable silhouette: a flower, two leaves and a pot. Limiting the example to four colors makes every cell and thread count easy to check. The empty background stays unstitched; it is not another thread color.
Start a blank chart. In Blank pattern, enter Tiny tulip, Width 24, Height 24, and Fabric count 14, then choose Create. This entry works without an account. If you are signed in, your Studio's Overview also has a Blank chart shortcut.
Prefer to sketch in pencil first? Use the printable graph paper tool to make a blank worksheet with your chosen squares. Its paper cell size is for drawing; use the fabric calculator below for stitched size on cloth.
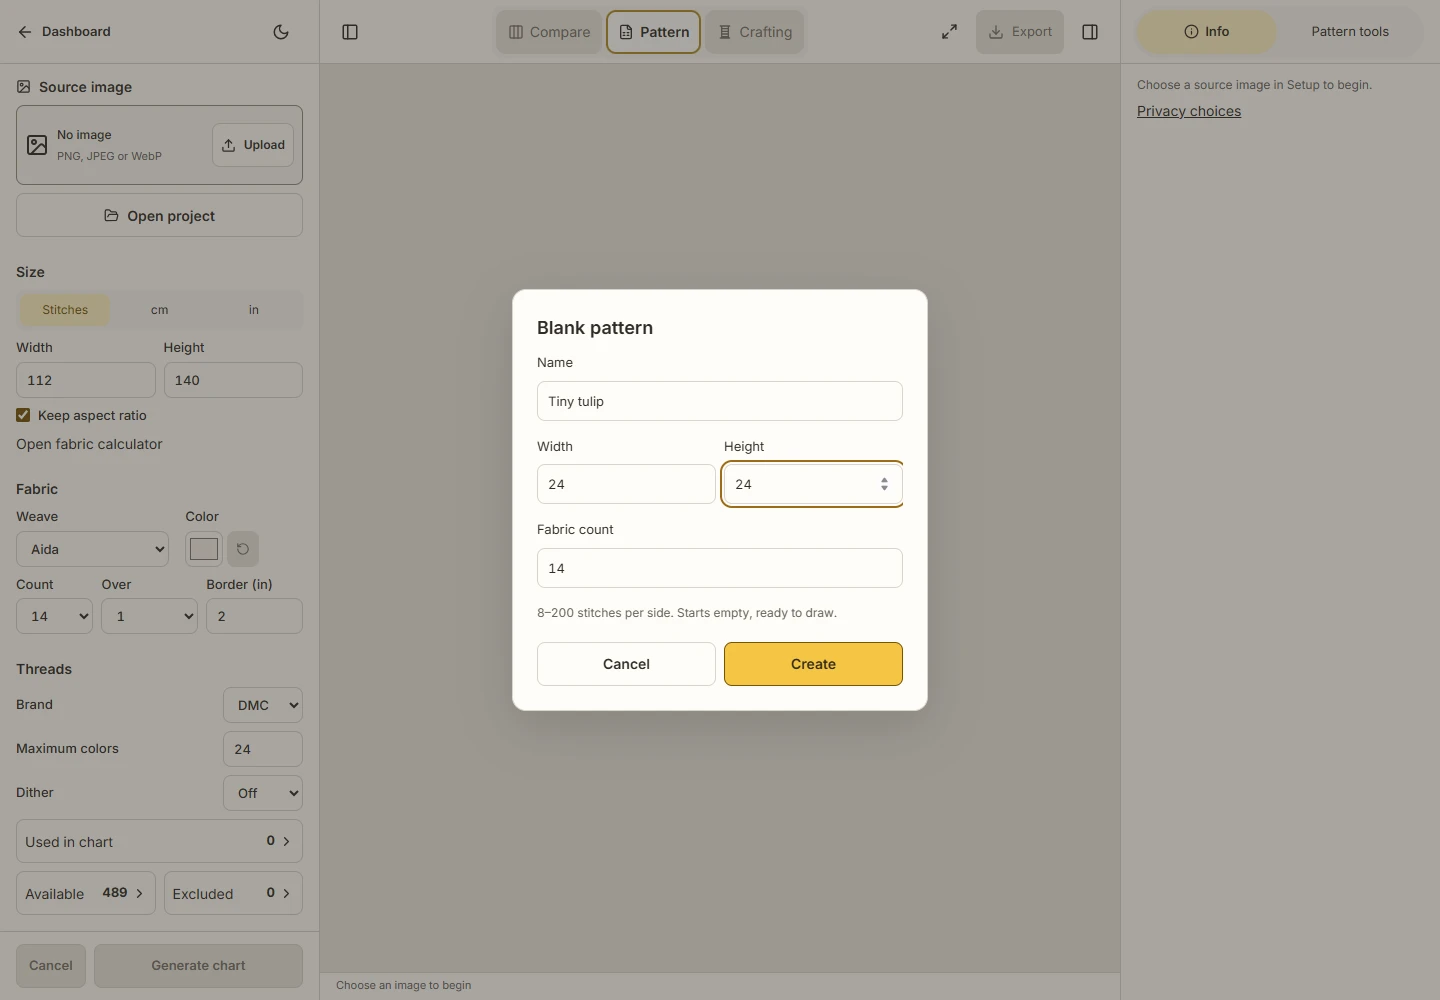
Actual creation settings. Open any operation screenshot at full size to inspect the controls.
You should see an empty board in Pattern mode. Keep Aida, Count 14 and Over 1 for this lesson. At those settings the entire 24-square board represents about 1.71 × 1.71 inches (4.35 × 4.35 cm) before fabric margins. That is the board area, including blank squares. The drawing occupies only 10 columns and 18 rows. Use the fabric calculator to choose a fabric cut and margins for your own project; this lesson has not been physically stitched or printed.
2. Pick the four drawing threads
In Pattern tools, select Cross, Draw, and Brush size 1. Click the drawing-thread card above the tools, search for a code, and select the matching DMC entry. Select a color before drawing its cells.
| Row-map letter | DMC code and name | Crosses in the finished chart |
|---|---|---|
| R | 666 — Bright Red | 30 |
| P | 761 — Salmon Light | 6 |
| G | 3346 — Hunter Green | 30 |
| T | 975 — Golden Brown Dark | 32 |
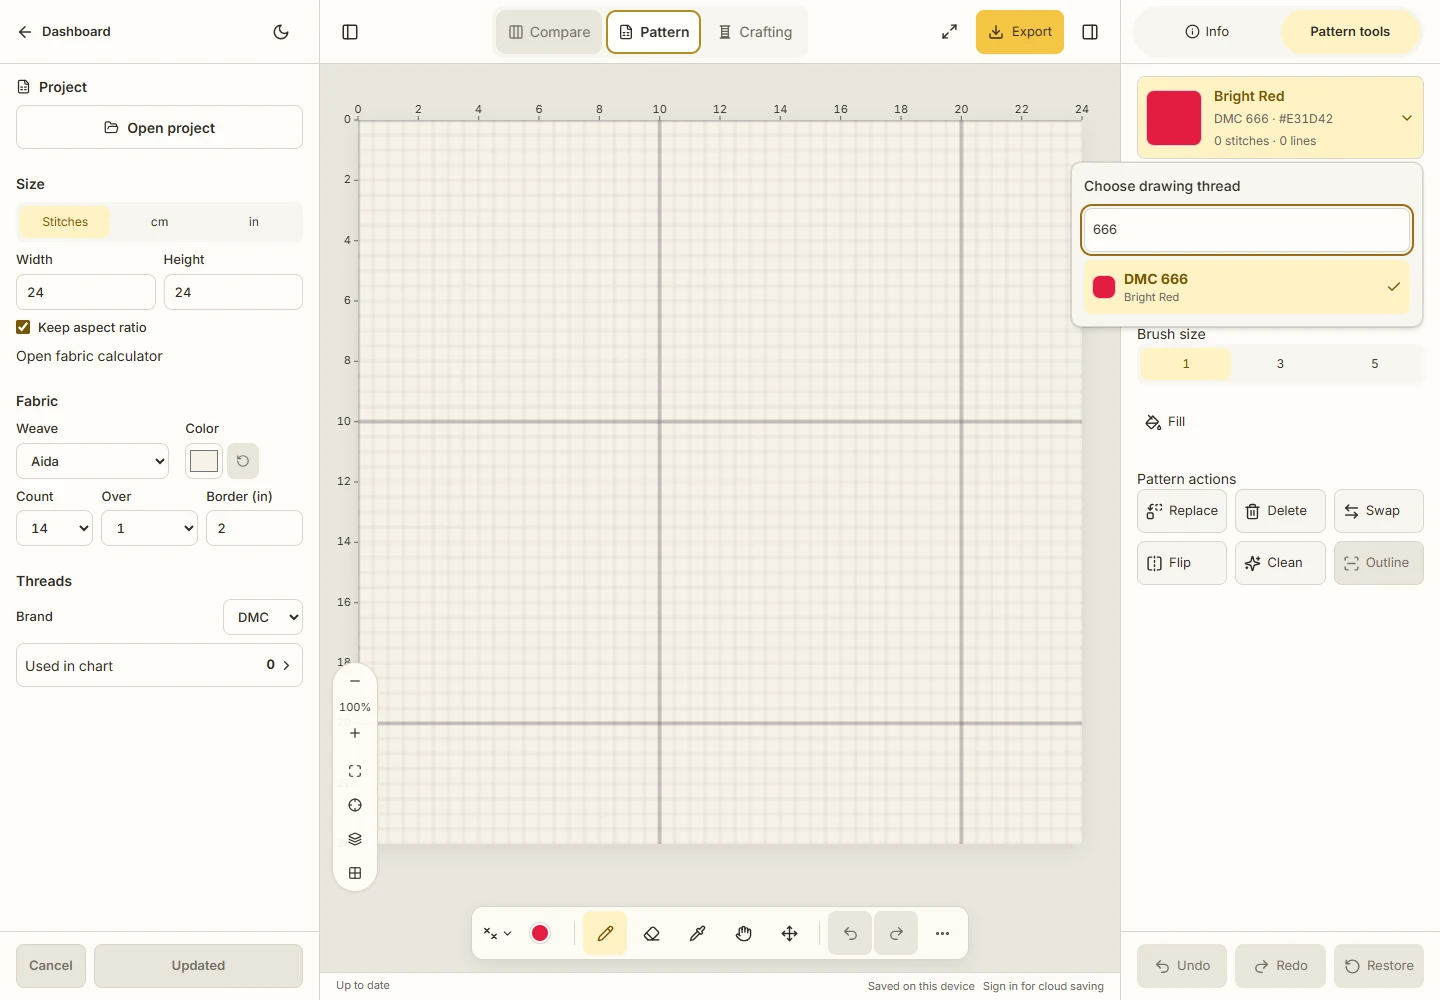
Search the exact code, then choose the matching thread. Screen swatches are estimates, not physical shade matches.
The chart key uses two strands for this example's Crosses. Its counts are individual Crosses, not skein quantities or stitching-time estimates. The initial drawing color may be black; choosing and using these four threads does not require painting the empty background black.
3. Draw the flower by counted squares
For the instructions below, count the first square at the top left as row 1, column 1. The editor's ruler marks grid boundaries beginning at 0; the first square is between boundaries 0 and 1. Each range includes both endpoints.
Draw the R cells first, then choose DMC 761 and add the P cells. Click one cell at a time with Brush size 1. You can drag across neighboring cells, but release the pointer between separated ranges so the gap stays blank.
| Row | R — DMC 666 | P — DMC 761 |
|---|---|---|
| 4 | Columns 8–9 and 14–15 | None |
| 5 | Columns 8–10 and 13–15 | None |
| 6 | Columns 8–9 and 12–15 | Columns 10–11 |
| 7 | Columns 8–9 and 12–15 | Columns 10–11 |
| 8 | Columns 9–10 and 13–14 | Columns 11–12 |
| 9 | Columns 10–13 | None |
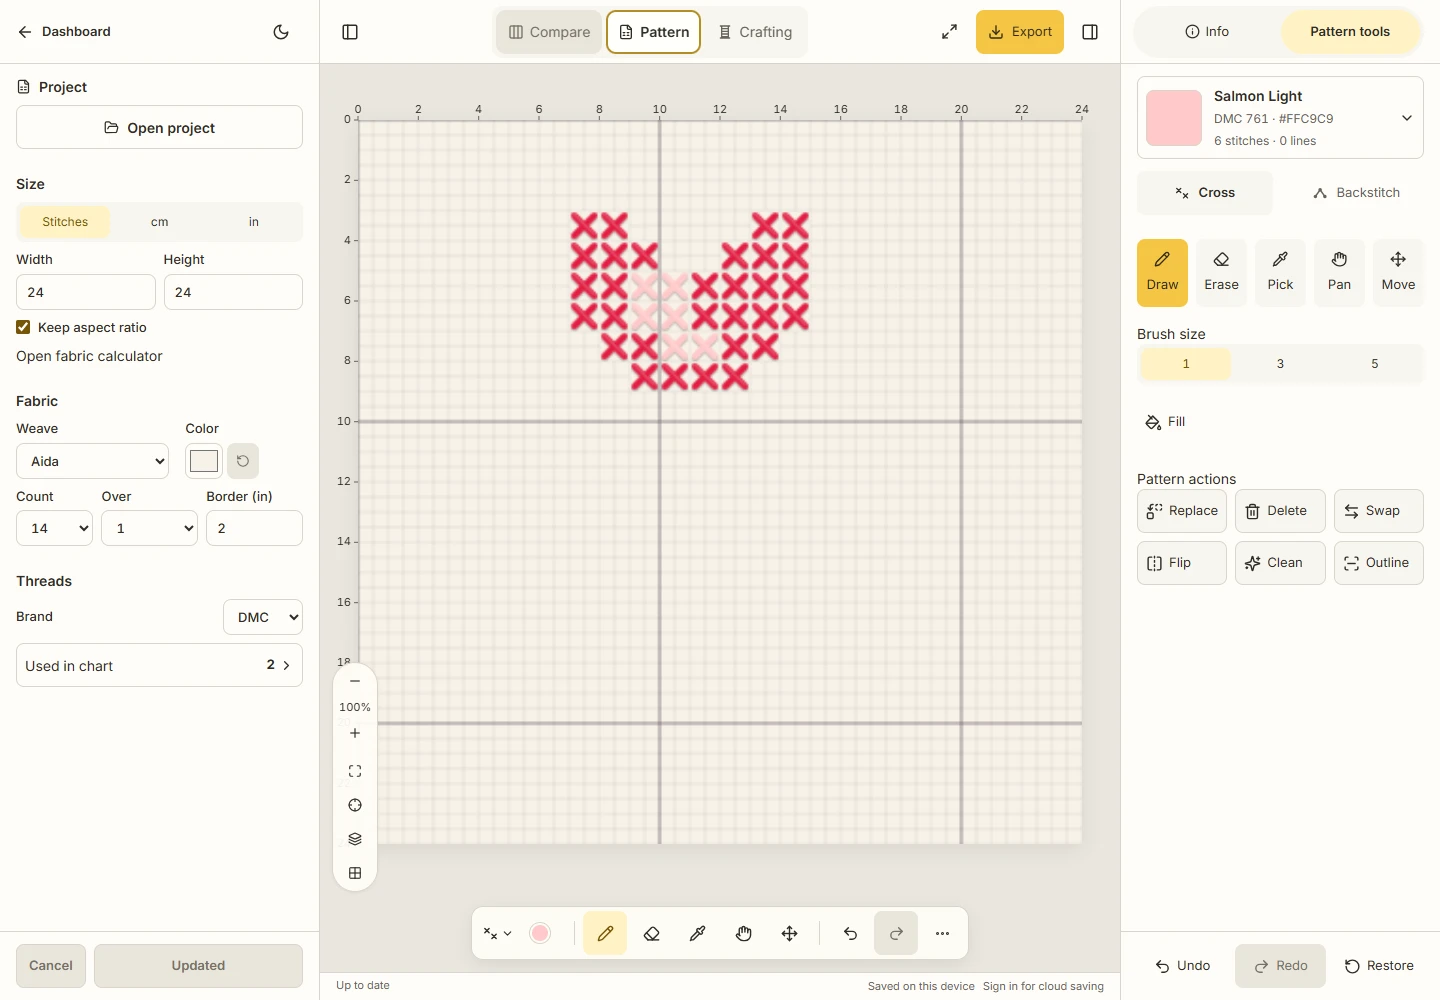
Checkpoint: the flower has 36 Crosses, including six pale pink squares. Everything below it is still blank.
If you paint the wrong square, use Undo, or choose Erase with Brush size 1 and remove only that cell. Redo restores an undone edit. Return to Draw before continuing. Avoid Fill here: it changes a connected region and can fill the blank background when that is the region you click.
4. Add the stem, leaves and pot
Select DMC 3346 and draw columns 11–12 on every row from 10 through 17. That makes the 16-Cross stem. Add these leaf cells in the same green:
| Row | Additional green columns |
|---|---|
| 12 | 7–10 |
| 13 | 8–10 and 13–16 |
| 14 | 13–15 |
You now have 30 green Crosses: 16 for the stem and 14 for the leaves. Select DMC 975 and draw the pot:
| Row | Brown columns |
|---|---|
| 18 | 7–16 |
| 19 | 8–15 |
| 20 | 8–15 |
| 21 | 9–14 |
Leave all other squares blank, including rows 1–3 and 22–24. Do not add an outline for this exercise; keeping the finished chart to one needle layer makes the total easy to verify. You can explore ordinary Backstitch separately in the editing tutorial.
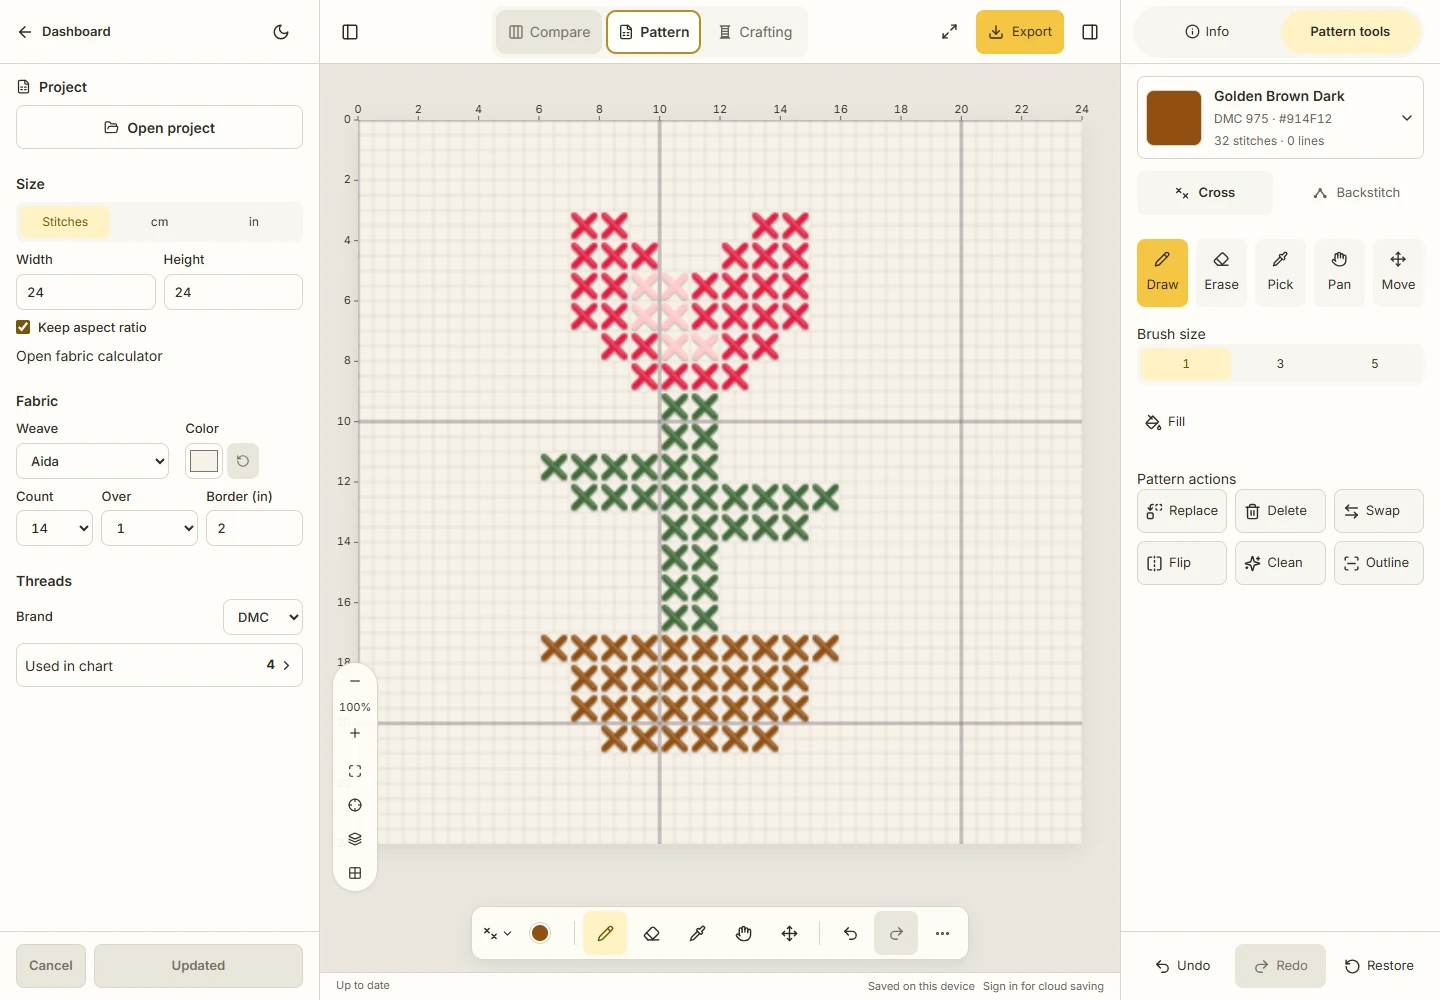
The completed design in the real editor. The selected pot thread shows 32 stitches; Used in chart shows four colors.
5. Check the pattern before sharing it
Compare your work with the finished project and its PDF key:
- The board is 24 × 24 and has 98 Crosses, four used colors and no lines.
- The code counts are 666: 30, 761: 6, 3346: 30, and 975: 32.
- Row 6, column 10 is pale pink; row 10, column 11 is green; row 18, column 7 is brown. Row 1, column 1 is empty.
- There are 478 empty squares. Do not turn them into white stitches.
The CSV gives all 576 positions if a count differs: R/P/G/T refer to the table above and . means no Cross. A pattern's chart marks are a separate system; match each actual mark to its own key rather than assuming a mark always means a particular DMC thread. See reading a chart and key.
6. Export a reading copy and reopen an editable backup
For the supplied PDF we used A4, Portrait, Fixed, a 4 mm chart cell and a complete one-column key. Its three pages contain an overview, the counted chart and the thread key. The 4 mm value controls the printed chart's reading scale; it does not mean a Cross measures 4 mm on 14-count fabric. Print at 100% when checking that selected chart scale. A real printer may still need its own paper and margin check.
For your own design, choose Export and review its format, settings and access details before preparing a file. PDF/SVG help you read and share the visible chart. A Crosy project preserves the editable work. Keep that backup somewhere you can find it; a device save alone is not a downloaded backup or a cloud copy. See export and backup help for the differences.
To check the supplied backup, download design-tulip.crosy, open the editor, and choose Open project. Back up your own work first. Select the downloaded file, return to Pattern, and verify the same tulip and counts. You can also open design-tulip-blank.crosy to repeat the exercise from an empty board.
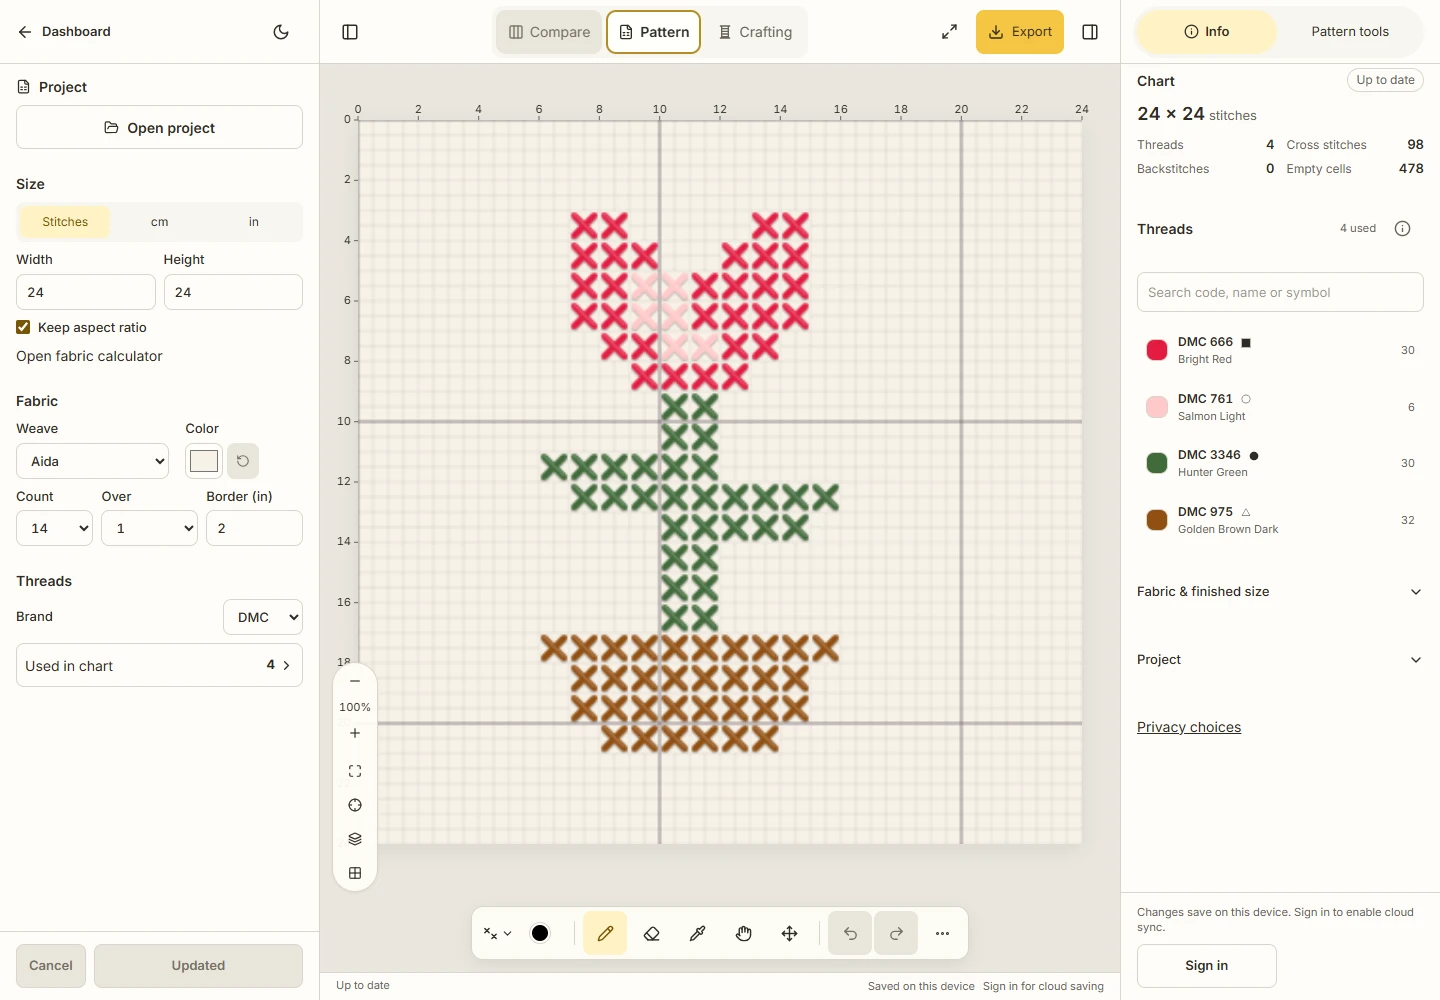
The downloadable finished project reopened in a fresh browser session. Its 98 Crosses and four thread identities are unchanged.
You may use and adapt this original teaching motif. When designing something else, start with your own artwork or material you have permission to use. A software chart and its downloadable files do not establish a physical stitching result, another app's import compatibility, or permission to copy someone else's design.